Create individual and bulk gift cards on the dashboard
You can create gift cards directly from the Loopz dashboard, without a sale at a register or on your online store. Create a single gift card for one recipient, or many gift cards at once for an event, a promotion, or a corporate order. Both follow the same four steps: the gift card details, the funding source, delivery, and a final review.
Who should read this
Merchants and staff who issue gift cards by hand: complimentary cards, store credit, donations, employee rewards, or bulk orders paid for outside of Loopz.
Before you start
- You need a gift card program with at least one enabled card design for digital gift cards. See creating a new card design in the dashboard.
- To activate physical gift cards, you need blank cards on hand. See ordering physical gift cards.
- Gift card amounts can't exceed the Maximum Balance of your program.
Where to find it
Go to the dashboard and click Create Gift Card at the top of the Home screen.

You can also open the Gift Cards screen and click New Gift Card in the top-right corner.

Choose single or multiple gift cards
Choose the kind of gift card creation you need:
- Create a single gift card: one gift card for one recipient.
- Create multiple gift cards: any number of gift cards, each with its own amount and recipient, created in one go.
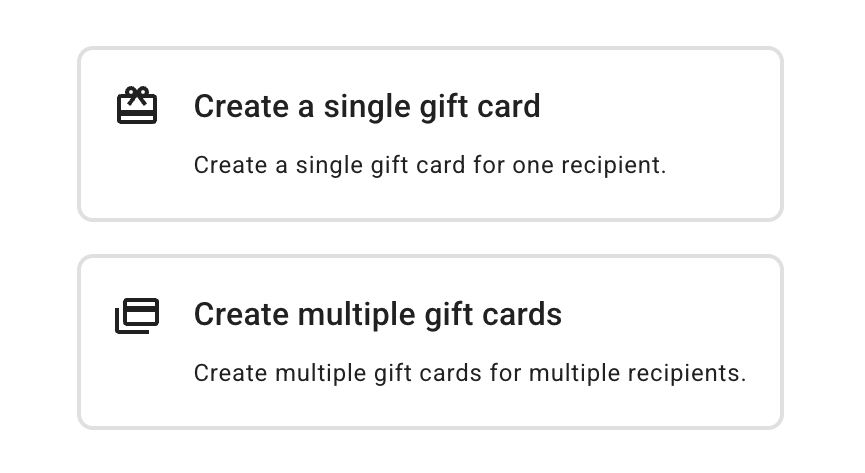
Create a single gift card
1. Gift card
Enter the Amount to load onto the gift card, then choose its format:
- Digital Card: pick the card design from the Gift card design dropdown. The design is shown on the gift card email and wallet page.
- Physical Card: link a blank physical card that will be activated with this amount. See Link a physical card below.
Next, add the gift recipient:
- New Recipient: enter the recipient's Name and Email. Phone is optional.
- Search Recipient: search for an existing customer of your program and select them.
- No Recipient: create an anonymous gift card. This option is only available for physical cards, since a digital card needs an email address to reach its holder.
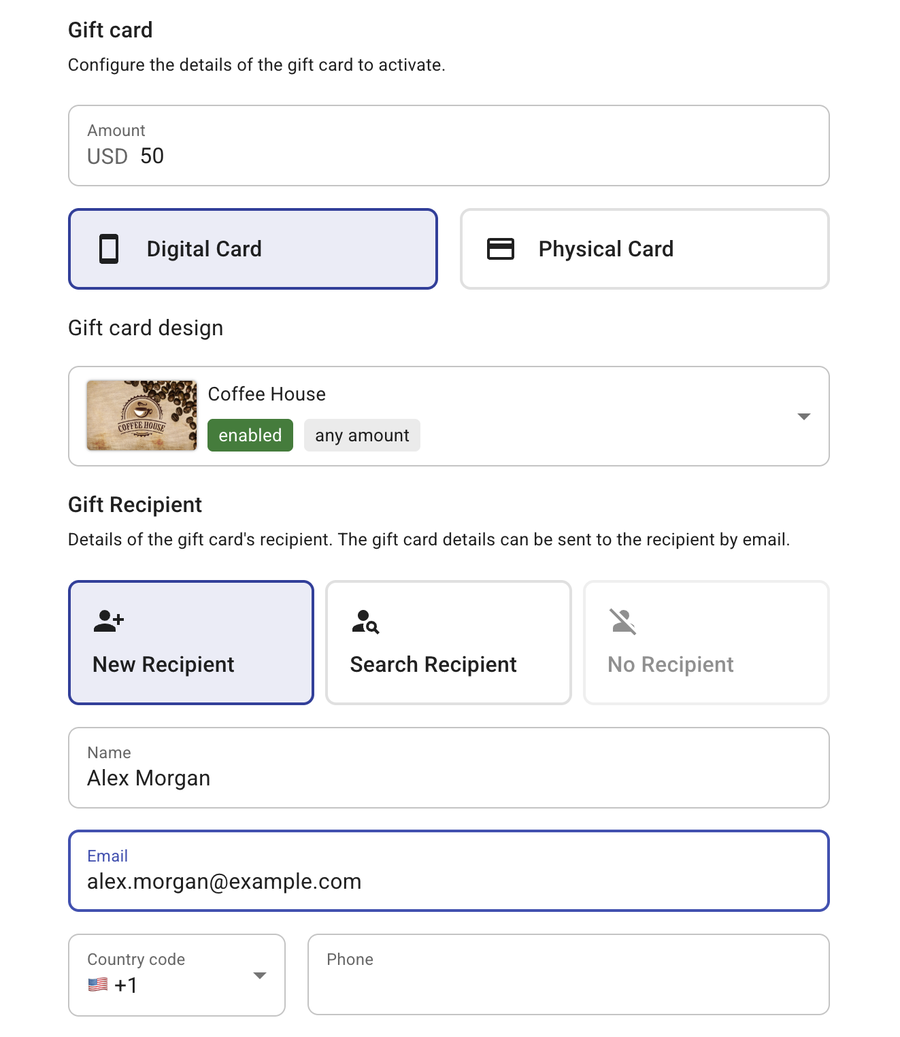
Click Next.
Link a physical card
When you choose Physical Card, the card design dropdown is replaced by a Link a card box. Click it to link the blank card you're handing over.
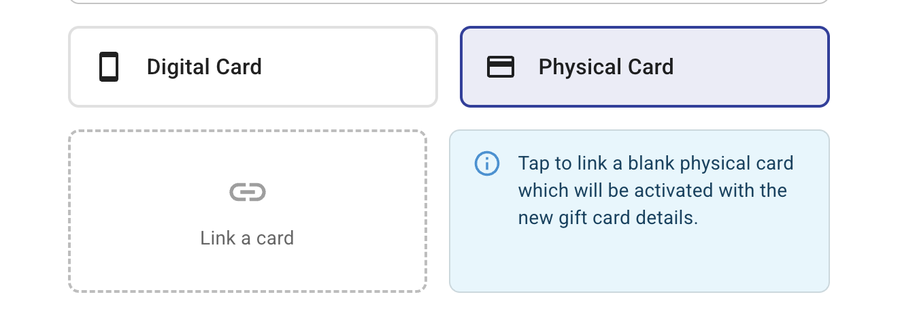
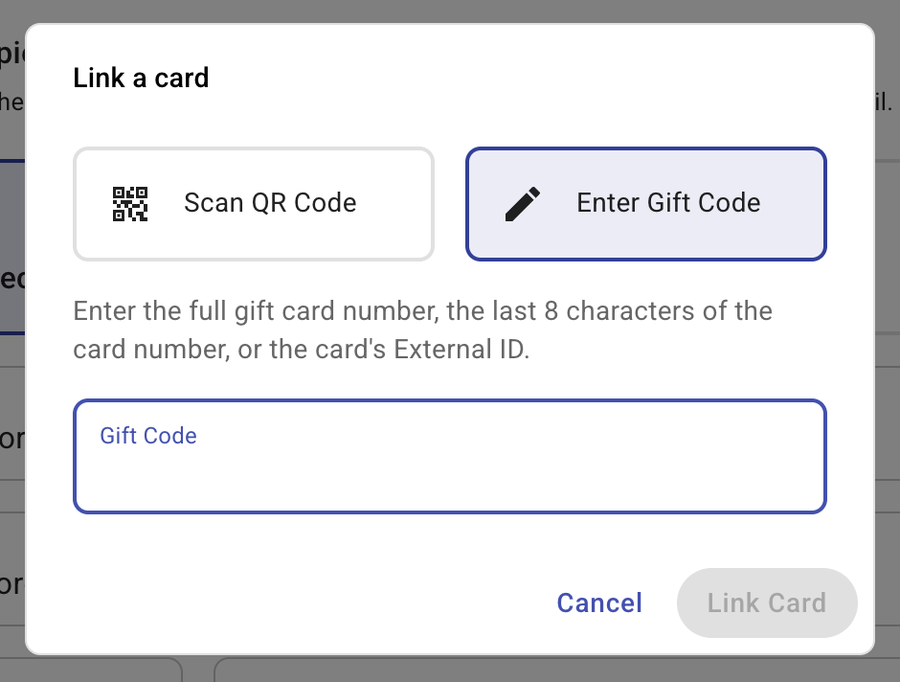
In the Link a card dialog, either:
- Scan QR Code: scan the QR code on the card with your computer's camera.
- Enter Gift Code: type the full gift card number, the last 8 characters of the card number, or the card's External ID.
Click Link Card. The card's design is shown in place of the Link a card box.
2. Funding source
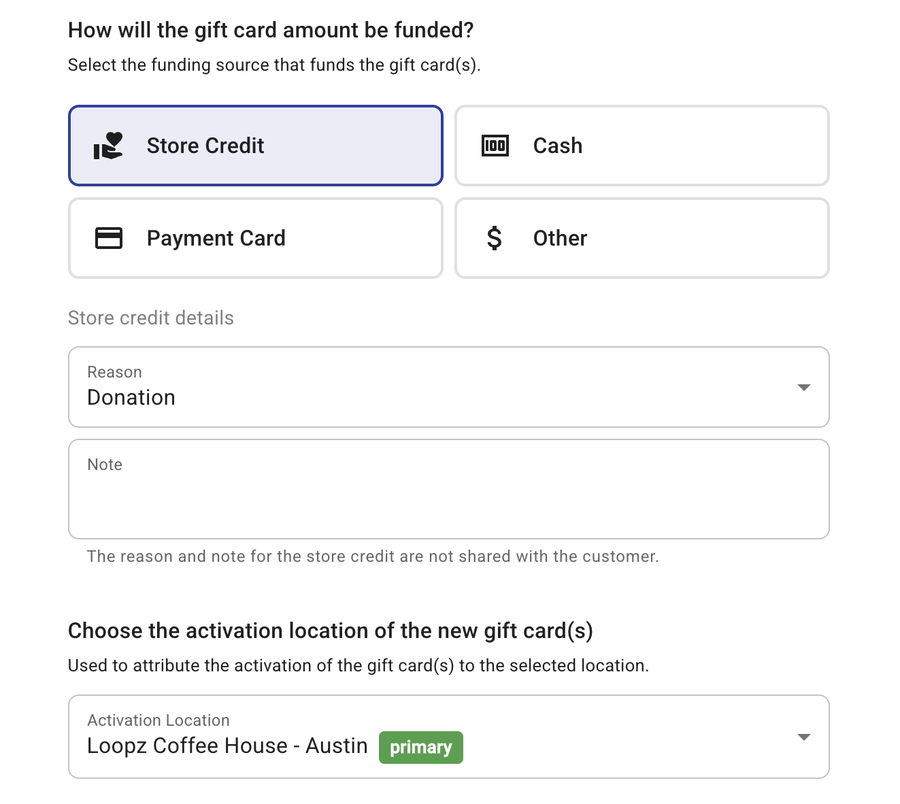
Choose how the gift card amount is funded. This is recorded on the gift card's activation and shows up in your reports.
- Store Credit: the gift card is issued as store credit. Choose a Reason (Refund, Compensation, Reward, Transfer, Employee, Donation, Return or Other) and add an optional Note. The reason and note aren't shared with the customer.
- Cash: the customer paid in cash.
- Payment Card: the customer paid by card outside of Loopz. Choose the Card Type and enter the Last 4 Digits for reference. The card isn't charged.
- Other: any other payment method. Enter a Tender Name, for example "Company check".
Then choose the Activation Location. The activation is attributed to this location in your reports. Your primary location is selected by default.
Click Next.
3. Delivery
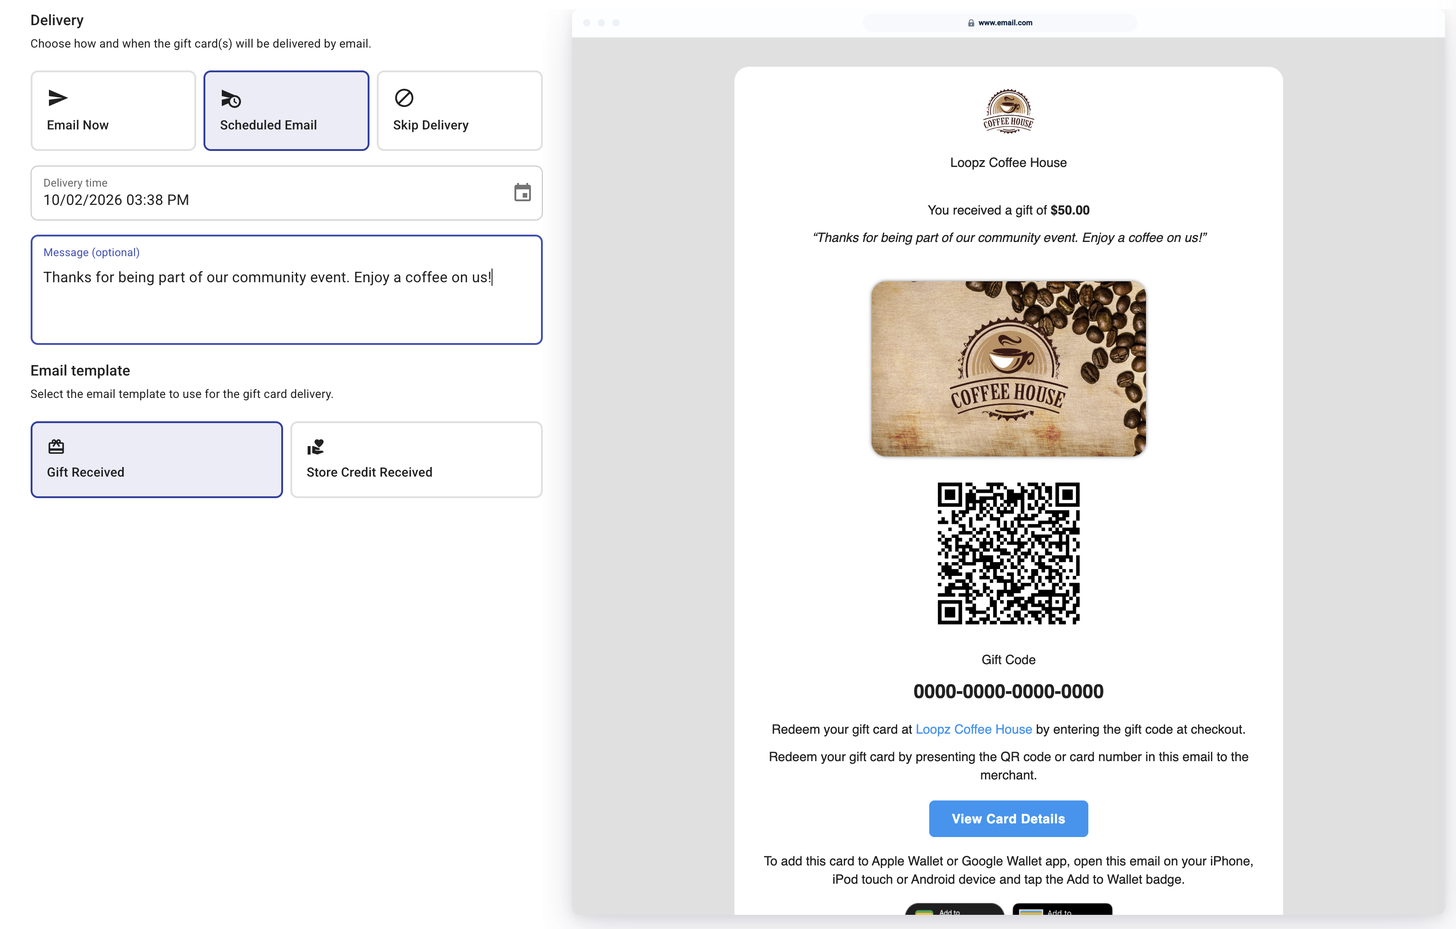
Choose how and when the recipient receives the gift card:
- Email Now: the gift card email is sent as soon as the gift card is created.
- Scheduled Email: the gift card email is sent at the Delivery time you pick, at least one hour from now. Use it for birthdays and holidays.
- Skip Delivery: no email is sent. This is the only option when the recipient has no email address.
For emailed gift cards, you can add an optional Message that appears in the email, then choose the Email template:
- Gift Received: the standard gift card email.
- Store Credit Received: the store credit email. Choose it when you're issuing the gift card as store credit.
A live preview of the email is shown on the right as you make changes. To change the content and styling of these emails, see customizing emails sent by your gift card program.
Click Next.
4. Review
Check the gift card, the funding source and the delivery details. Click edit next to Funding source or Delivery to go back and change them.
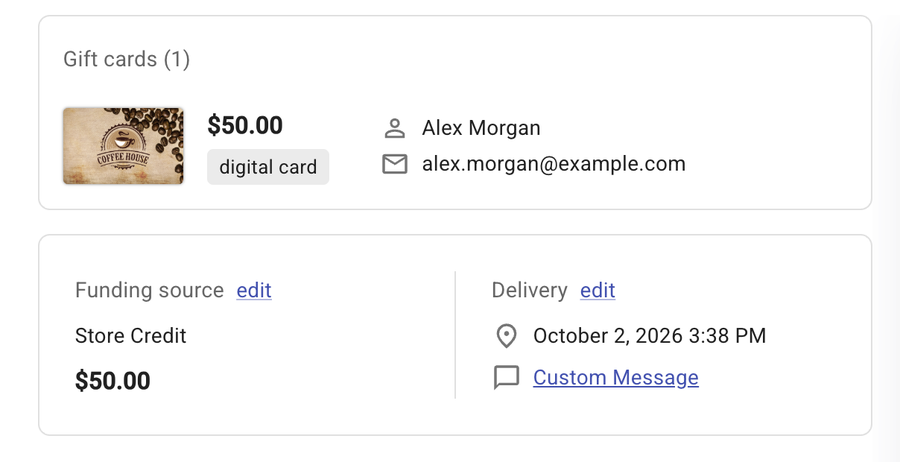
Click Create Gift Card. When the gift card is created, its card number and recipient are shown. Click Done to close the dialog. The new gift card appears on the Gift Cards screen.
Create multiple gift cards
Creating multiple gift cards follows the same steps, but the first step builds a list of gift cards. The list is shown on the right under Gift cards, with the count in brackets.
1. Gift cards
Add gift cards to the list in either or both of these ways.
Add gift cards one at a time. Enter the Amount, choose Digital Card or Physical Card, pick the card design (or link a physical card), and fill in the recipient the same way as for a single gift card. Set Quantity to create several identical gift cards for the same recipient, then click Add Gift Card. The amount and card design stay filled in, so you can quickly add the next recipient.
Upload a gift card list. Drag a file onto the Upload gift card list area, or click it to choose a file. The gift cards in the file are added to the list using the card design currently selected. Supported files:
- CSV and Excel spreadsheets: one row per gift card. Columns are matched by their headers, so "Name", "Recipient Name" or separate "First Name" and "Last Name" columns all work, as do "Email" and "Amount" or "Value". Add a "Quantity" column to create several gift cards from one row.
- PDFs, documents and images: for example a scanned order form or a photo of a printed list. We read the recipients, emails and amounts from the file.
For example, this CSV adds three gift cards:
| Name | Amount | |
|---|---|---|
| Sam Rivera | sam.rivera@example.com | 50 |
| Priya Patel | priya.patel@example.com | 50 |
| Chris Nguyen | chris.nguyen@example.com | 100 |
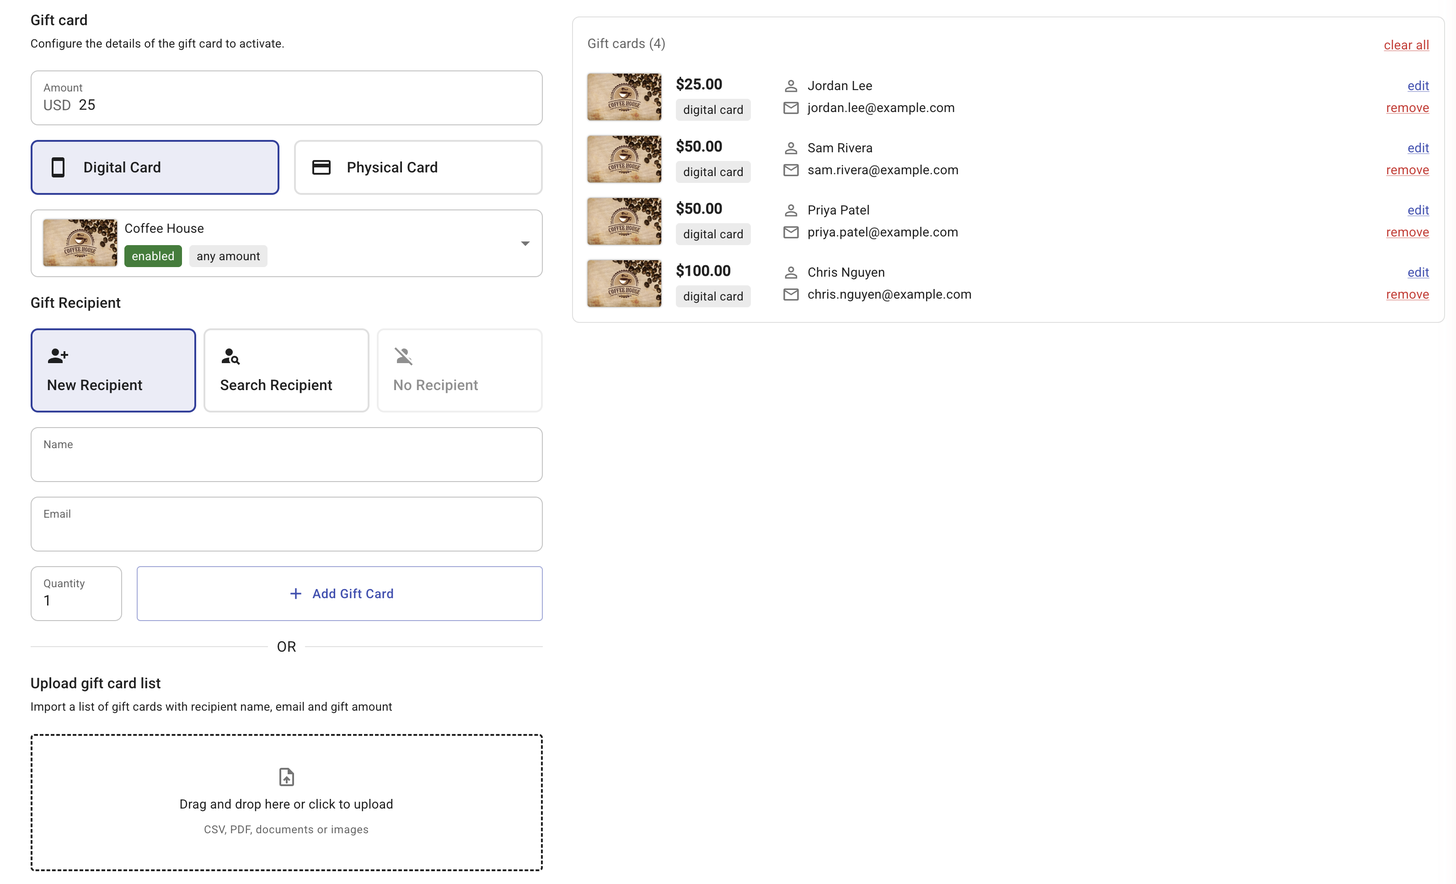
Review the list before continuing. Click edit on a gift card to load it back into the form and change it, remove to delete it, or clear all to start over.
If an uploaded file has an amount above your program's Maximum Balance, the upload is rejected with the row number. Fix the amount in the file and upload it again.
Click Next.
2. Funding source
Choose the funding source and Activation Location, the same as for a single gift card. The funding source applies to every gift card in the list.
3. Delivery
Choose Email Now, Scheduled Email or Skip Delivery, and add an optional Message. With multiple gift cards there's a third email template:
- Gift Received or Store Credit Received: each recipient gets their own email with their gift card.
- Bulk Gift Received: one email with all the gift cards is sent to the Recipient Email you enter. Use it when a single person, such as an event organizer or a corporate buyer, hands the gift cards out.
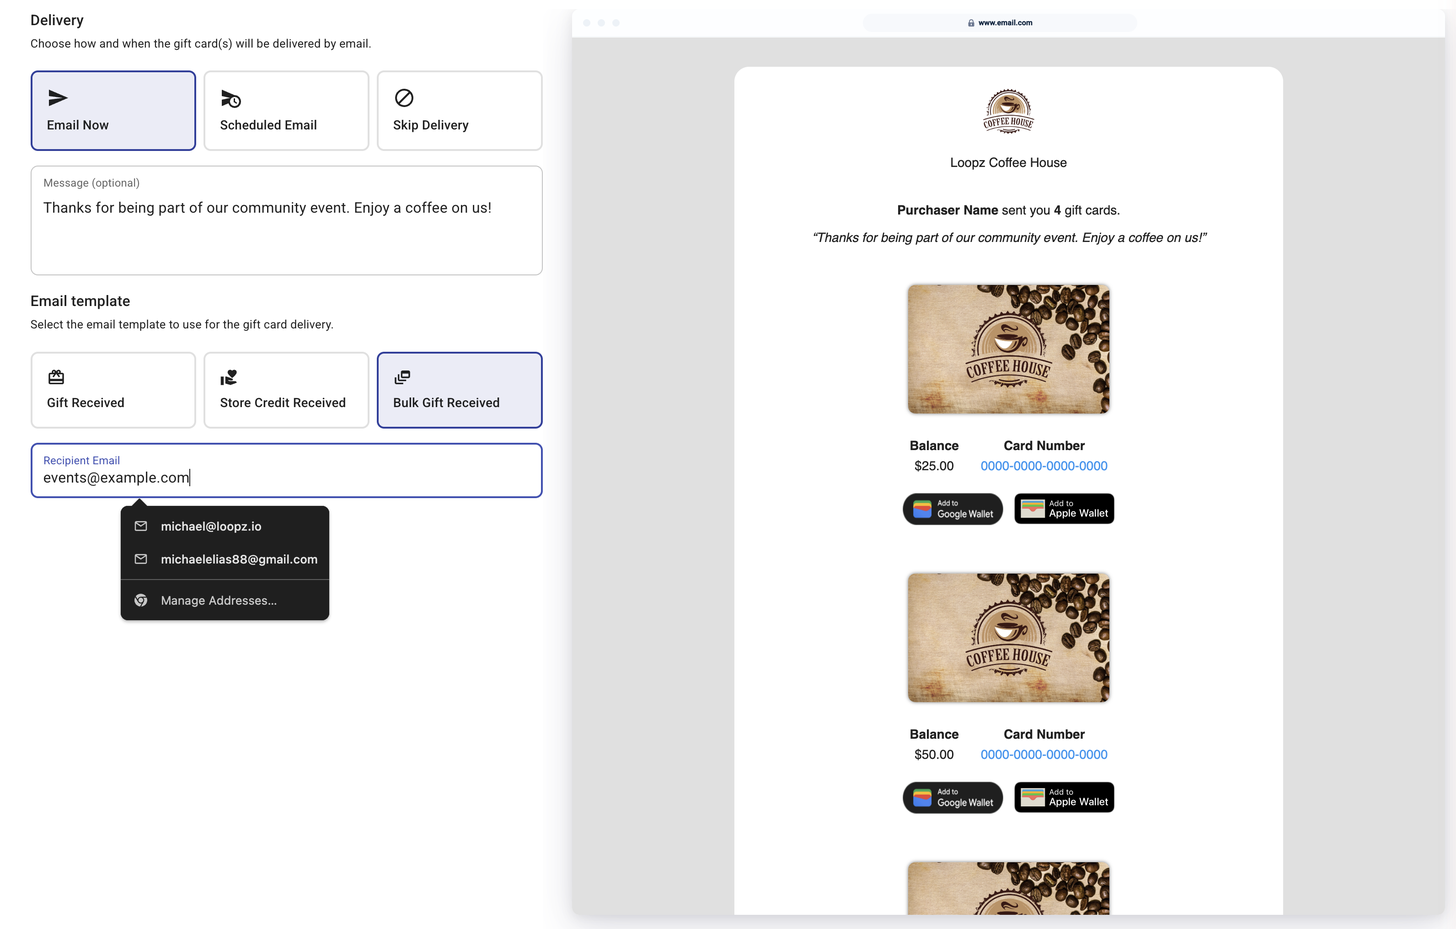
Click Next.
4. Review
Check every gift card in the list, the funding source with the total amount, and the delivery details.
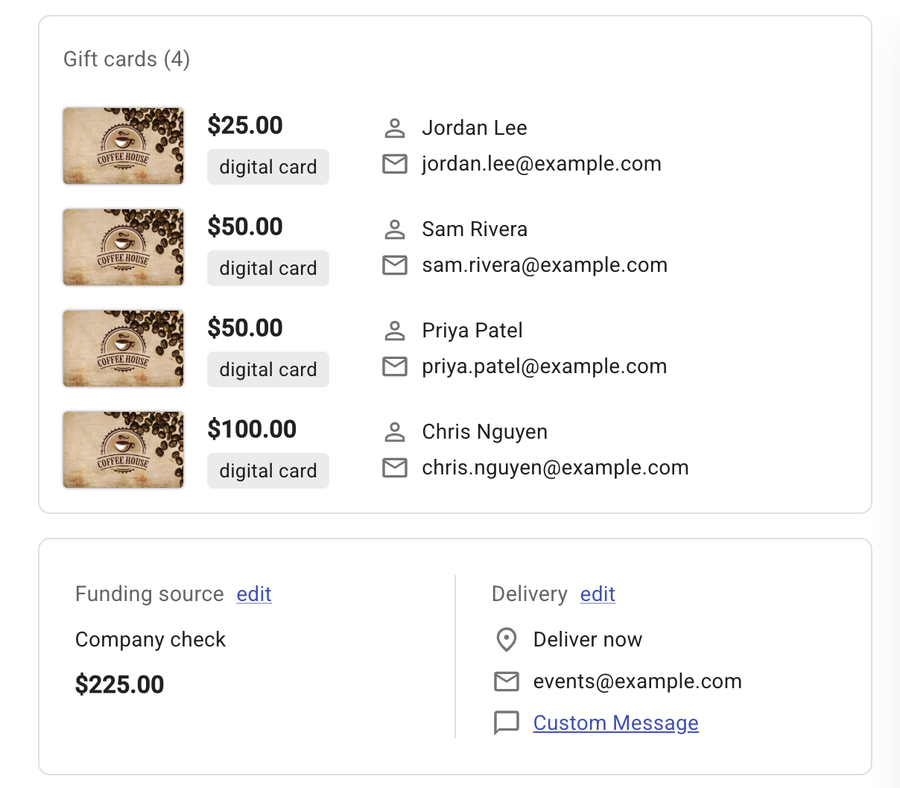
Click Create Gift Cards. A progress bar shows the gift cards being created. When it finishes, you'll see each gift card with its card number. If some gift cards couldn't be created, they're marked as failed with the reason, and the others are still created. Click Done to close the dialog.
FAQ
- Is the payment card charged when I choose Payment Card as the funding source? No. The card type and last 4 digits are recorded for reference only. Take the payment through your usual payment method.
- Can I create a gift card without sending an email? Yes. Choose Skip Delivery in the delivery step. You can share the gift card details with the customer yourself.
- Can I change a scheduled delivery after creating the gift card? Yes. Open the gift card on the Gift Cards screen to change its delivery.
- Which card design is used for gift cards from an uploaded file? The card design selected in the form when you upload the file. Use edit to change the design of an individual gift card afterwards.
- Do gift cards created on the dashboard trigger incentives? No. Incentives aren't applied to gift cards created on the dashboard, so the amount you enter is the amount loaded onto the gift card. To give a bonus, include it in the amount.
Ready to sell more gift cards?
One gift card program across your point of sale and online store, always in sync.